WE'RE THE HARDWOOD EXPERTS. CALL US NOW: +1 878-217-6297
How To Get Paint Off Hardwood Floors? 2024 Guide
When I first saw paint spilled all over my beautiful wooden floors, I was really worried. I thought getting rid of the paint without ruining the floors would be super hard. But I wanted my floors to look nice again, so I decided to figure out how to clean them up the right way. I spent some time looking up the best ways to do it, making sure I wouldn’t scratch or damage the wood.
I started by picking tools that were safe for the wood, like a plastic scraper and very fine sandpaper. Before using them on the visible parts of the floor, I tried them in hidden spots to make sure they wouldn’t hurt the wood. I learned that being gentle and patient was key. By holding the scraper just right and sanding in the same direction as the wood lines, I managed to get most of the paint off without leaving marks.
For some really stubborn paint, I had to use a special cleaner made just for wood. I was really careful to follow the instructions so I wouldn’t mess up the floors. Seeing the wood clean and nice again after all that work felt great. This whole thing taught me a lot, like how to clean up messes carefully and appreciate my wooden floors even more. It showed me that with the right approach and a bit of patience, you can fix things up without causing damage.
Understand the Type of Paint
When I first had to clean paint off my wooden floors, the first thing I did was figure out what kind of paint it was. This is important because some paints are way easier to get off than others. There are mainly two kinds: water-based and oil-based. Water-based paint is the kind that washes off with just water. It’s usually easier to deal with. Oil-based paint is tougher and needs stronger stuff like mineral spirits to remove it. I checked the paint can for clues. If the can said to clean up spills with water, I knew it was water-based. But if it said I needed something stronger, like thinner, then it was oil-based. Knowing this helped me decide how to tackle the mess without making it worse.
Understanding the type of paint made a big difference in how I approached the whole cleanup process. For water-based paint, I felt more relaxed because I knew it wouldn’t be too hard to remove. I planned to use simple methods that wouldn’t harm my floors. But finding out I had oil-based paint to deal with meant I had to be ready for a bit more work. I needed to get specific cleaning supplies that could dissolve this kind of paint without damaging the wood underneath. This step of identifying the paint type saved me from making mistakes, like using harsh chemicals on an easier-to-remove water-based paint or trying to clean up a tougher oil-based paint with just water and making no progress.
Prepare the Area
When getting ready to remove paint from hardwood floors, it’s crucial to set up your workspace properly. Here’s how I did it, broken down into manageable steps:
1. Ventilate the Room:
Open all the windows wide and use fans to keep the air moving. This helps clear out any harmful fumes from paint removers and makes it safer to breathe while working. It’s especially important if you’re using strong chemicals.
2. Wear Protective Gear:
Put on gloves and safety glasses. The gloves protect your hands from chemicals that can irritate or burn your skin and from any sharp objects you might need to scrape off paint. Safety glasses keep your eyes safe from splashes, ensuring that you don’t get any chemicals or debris in your eyes, which can be painful and dangerous.
3. Protect Furniture and Flooring:
Move lightweight furniture out of the room to avoid accidental spills or splatters. For heavier items that are difficult to move, cover them thoroughly with old sheets or tarps. This keeps them safe from any chemical spills or paint flecks that might fly off while you’re working. Lay down protective coverings on adjacent flooring as well, just in case of drips or spills, ensuring that your efforts to clean one mess don’t create another.
Taking these preparatory steps seriously made a significant difference in my paint removal project. It helped me avoid additional cleanup, protected my health and safety, and ensured that my furniture and non-affected parts of the floor remained intact and unharmed. This preparation might seem like a bit of extra work upfront, but it pays off by making the actual task of removing paint smoother and safer.
Method 1: Scraping and Sanding
For my paint removal project, I discovered that combining scraping and sanding was an effective approach for both water-based and oil-based paints, particularly when the paint hadn’t fully settled in yet. Here’s how I went about it, explained step by step:
Scraping
1. Choosing a Plastic Putty Knife:
I used a plastic putty knife because it’s much less likely to scratch the wood compared to metal tools. It was crucial for me to preserve the beauty of the hardwood beneath the paint.
2. Proper Knife Angle:
I found that holding the knife at a low angle against the floor was the best technique. This way, the knife could slide under the paint without digging into the wood. It was a delicate balance to strike, but it significantly reduced the risk of leaving gouges or deep scratches in the wood.
3. Pacing Myself:
Patience was key here. Rushing could have resulted in damage to the hardwood. So, I took my time to gently lift the paint, applying just enough pressure to remove it without harming the wood beneath.
Sanding
Once I had scraped away as much paint as possible, I moved on to sanding:
1. Using Fine-Grit Sandpaper:
I selected fine-grit sandpaper, between 120 and 150 grit, which was abrasive enough to remove the remaining paint but fine enough to prevent scratching the wood. Sanding in the direction of the wood grain was essential to maintaining the integrity of the floor’s appearance.
2. Opting for an Electric Sander:
For bigger patches of paint, I decided an electric sander would be more efficient. It saved me a lot of time and effort. However, I was very careful with it, ensuring I didn’t press too hard or linger too long in one spot, which could have damaged the wood.
This method, though labor-intensive, was highly effective. It allowed me to remove the unwanted paint while keeping my hardwood floors in top condition. The key throughout the process was to balance efficiency with gentleness, ensuring that in my eagerness to rid the floor of paint, I didn’t compromise the wood’s beauty and structure.
Method 2: Chemical Paint Strippers
Facing some stubborn patches of paint that neither scraping nor sanding could budge, I turned to chemical paint strippers, a method I was initially hesitant to use due to the chemicals involved. However, I chose a product specifically designed for hardwood floors, which eased my concerns about potential damage. Here’s a detailed breakdown of how I tackled the task:
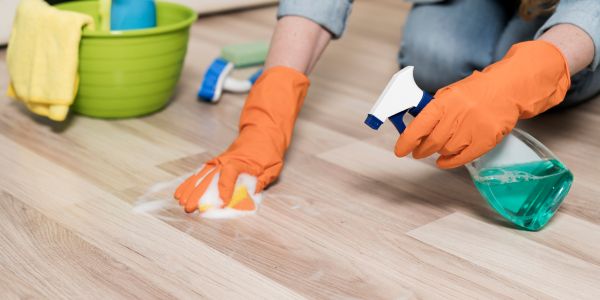
1. Applying The Stripper:
Armed with a paintbrush, I carefully applied a generous layer of the chemical stripper over the troublesome paint spots. The goal was to cover the paint completely, forming a thick layer that could penetrate and soften the paint. It felt a bit like painting, only in reverse, where the aim was to remove rather than add color.
2. Waiting Time:
Patience played a big role here. After applying the stripper, I had to let it sit and work its magic. The product label suggested a waiting time of 15 to 30 minutes, so I used this interval to ventilate the room further and ensure my safety gear was properly in place. Watching the paint slowly soften was oddly satisfying, a visual confirmation that the process was working.
3. Scraping the Paint Away:
Once the paint had softened, it was time for the plastic scraper to make its comeback. The previously tough paint now gave way with surprising ease, peeling off in large strips rather than chipping away in small flakes. This part of the process was remarkably gratifying, as I could see the original wood emerging from underneath the paint.
4. The Final Clean-Up:
After scraping away the bulk of the softened paint, a sticky residue remained. A damp cloth was my tool of choice for this final step, carefully wiping away any remnants of the stripper and the last bits of paint. This not only cleaned the surface but also neutralized the stripper, ensuring no harmful chemicals lingered on the wood.
This method, while more chemical-intensive than the first, proved to be incredibly effective for those patches of paint that seemed almost part of the wood itself. The chemical stripper, when used responsibly and according to the manufacturer’s instructions, was a powerful ally in restoring my hardwood floors to their natural state.
Method 3: Heat Guns
When I encountered a few particularly stubborn spots of paint that seemed impervious to both scraping and chemical strippers, I decided to give the heat gun method a try. This approach required a bit more caution due to the risk of damaging the wood or even causing burns, but it offered an effective solution for loosening hard-set paint. Here’s how I managed the process:
1. Applying Heat:
With the heat gun in hand, I started by holding it about 6 inches away from the painted area. I moved it slowly back and forth over the paint. It was fascinating to watch the paint begin to bubble and lift from the wood, a clear sign that it was ready to be scraped off. This step needed a steady hand and patience to ensure even application of heat without lingering too long in one spot, which could potentially harm the wood underneath.
2. Gentle Scraping:
As soon as the paint started to bubble, I switched off the heat gun and picked up the plastic scraper. Working while the paint was still soft from the heat made a significant difference. The paint came off much more easily than when I was just scraping or using chemical strippers, almost like peeling fruit. The key here was to maintain a gentle touch to avoid gouging the wood, scraping in smooth, controlled motions.
3. Avoiding Overheating:
One of the critical things I kept in mind was the danger of overheating the wood. Excessive heat can lead to discoloration and even warping, which would be counterproductive. I was careful to move the heat gun continuously and to not focus on any single area for too long. After each section was treated and the paint removed, I allowed the area to cool down completely before assessing if another pass was necessary.
Using a heat gun turned out to be a highly effective method for removing the last of the paint, especially for areas where other methods fell short. The combination of heat application followed by immediate scraping preserved the integrity of the wood while removing the paint. It was a method that required a bit more finesse and caution but ultimately contributed significantly to restoring my hardwood floors to their original, paint-free condition.
Aftercare
After successfully removing all the unwanted paint from my hardwood floors, I turned my attention to the crucial final step: aftercare. This stage was all about ensuring the longevity and beauty of the wood now that it was exposed and potentially more vulnerable. Here’s how I approached the aftercare process:
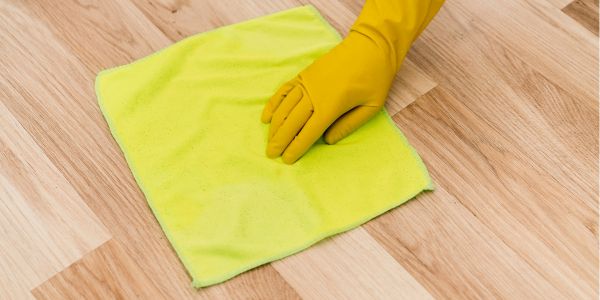
- Cleaning The Floor:
With the paint gone, my first task was to thoroughly clean the floor. I used a specialized wood cleaner, which helped to remove any remaining dust, debris, or chemical residue from the stripping and sanding processes. This step was vital not only for the floor’s appearance but also to prepare it for refinishing. It ensured that the surface was perfectly clean, which is necessary for the next steps to be effective. The cleaner I chose was gentle on the wood, safeguarding its natural texture and color.
- Refinishing The Floor:
The extent of the previous procedures—scraping, sanding, and chemical stripping—meant that some areas of the floor were more affected than others. To restore a uniform look and protect the wood, refinishing was essential. I matched the stain to the existing floor color as closely as possible, which required a bit of trial and error with test patches in inconspicuous areas. Once I found the right shade, I applied it carefully, followed by a protective sealant. This sealant is crucial as it forms a barrier against moisture, dirt, and future wear and tear, ensuring the floor remains beautiful and durable for years to come.
The aftercare process was as important as the paint removal itself. It ensured that my efforts to remove the paint didn’t leave the wood unprotected or compromise its beauty. By cleaning and refinishing the floor, I not only preserved its appearance but also its strength and resilience. This comprehensive approach—from initial cleaning to final refinishing—was a testament to the importance of thoroughness and care in home maintenance projects.
Conclusion
Concluding this journey of removing paint from hardwood floors, it’s clear that the task demands not just the right set of tools and methods, but also a considerable amount of patience and finesse. Each method I employed, whether it was the manual effort of scraping and sanding, the chemical approach with strippers, or the careful application of heat, highlighted the importance of proceeding with caution. The aim was always to lift the paint without leaving a mark on the beautiful wood beneath.
This experience reinforced the notion that there’s no one-size-fits-all solution to paint removal. The choice between methods depends on the type and age of the paint, as well as the condition of the wood. However, the underlying principle remains consistent: slow and steady wins the race. Rushing through the process or using too much force can lead to irreversible damage, while a gentle and meticulous approach can unveil the wood’s original splendor.
Ultimately, the effort and attention to detail pay off when you see your hardwood floors restored to their former glory. It’s a reminder of the resilience of wood and its timeless beauty, as well as a testament to the value of preserving what we have. Removing paint from hardwood floors isn’t just about erasing mistakes or reversing spills; it’s about renewing and cherishing a piece of your home’s character. With the right approach, the floors can once again contribute to the warm and inviting atmosphere of your home, just as they were meant to.