WE'RE THE HARDWOOD EXPERTS. CALL US NOW: +1 878-217-6297
Mastering Hardwood Floor Installation: A Comprehensive DIY Guide
Introduction
As a seasoned hardwood flooring specialist with years of hands-on experience, I’ve guided countless homeowners through the process of installing their own hardwood floors. This popular home improvement project not only enhances the beauty and ambiance of a space but also significantly boosts the property’s value. Known for their exceptional durability and timeless appeal, hardwood floors are an ideal choice for those seeking to elevate their home’s aesthetics and functionality.
In this guide, I will share essential tips and techniques to ensure you can confidently install hardwood floors, achieving professional-quality results that will stand the test of time. Whether you’re a DIY enthusiast or a first-timer, this comprehensive guide will equip you with the knowledge to transform your living spaces effectively.
Choosing the Right Hardwood Flooring
Types of Hardwood
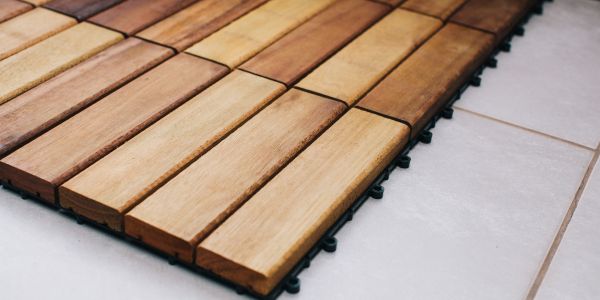
When selecting hardwood flooring, you have two primary options: solid hardwood and engineered hardwood. Solid hardwood is crafted from a single piece of wood, providing a classic, authentic look that can be sanded and refinished multiple times. Engineered hardwood, on the other hand, consists of a top layer of real hardwood adhered to multiple layers of plywood or fiberboard, offering enhanced stability and resistance to moisture. This makes engineered hardwood suitable for areas with varying climate conditions or higher moisture levels.
Selecting the Wood
The selection of wood species is crucial as it impacts both the aesthetics and durability of your floor. Hardwoods like oak, maple, and hickory are known for their toughness and are ideal for high-traffic areas due to their resistance to wear and scratches. Consider the Janka hardness rating of the wood, which measures its resistance to denting and wear. In addition to hardness, think about the color and grain pattern that will best complement your home’s decor. For example, lighter woods can brighten up a room, while darker woods make for a more dramatic and cozy ambiance.
Preparation
Before installation, it’s essential to acclimate the wood to your home’s specific conditions to prevent expansion or contraction post-installation, which can lead to warping or gaps. Lay the unopened boxes of hardwood flat in the room where they will be installed for at least 48 to 72 hours. This step adjusts the wood to the room’s temperature and humidity levels, ensuring a more stable and long-lasting installation. Additionally, calculate the total square footage of the space and purchase an extra 10% of material to account for cuts, mistakes, and future repairs, ensuring you have enough flooring to complete your project seamlessly.
Tools and Materials Needed
List of Tools
Proper tools are imperative for a successful hardwood floor installation. Key tools include:
- Circular Saw or Miter Saw: Essential for making precise cuts on your hardwood planks to fit the dimensions of your room accurately.
- Tape Measure: Vital for measuring floor space and wood planks to ensure accurate cuts and layout.
- Pneumatic Nailer: Used for solid hardwood installations, this tool helps you securely fasten the flooring to the subfloor quickly and efficiently.
- Hammer: Necessary for manual adjustments and to use with a tapping block when installing engineered hardwood.
- Tapping Block and Pull Bar: These tools help in fitting the planks tightly together without damaging the edges.
Materials
- Underlayment or Moisture Barrier: This is crucial for creating a flat, stable base and protecting your new floors from moisture, especially if you are installing over concrete or below ground level.
- Nails or Flooring Staples: Used with a pneumatic nailer for solid hardwood floors to secure the flooring to the subfloor.
- Adhesive: Required if you choose a glue-down installation method, particularly for engineered hardwood. Ensure the adhesive is compatible with both your subfloor and the type of hardwood flooring.
- Wood Filler: To fill any gaps or imperfections that might appear after the installation.
- Finishing Nails: For securing the final row and any trim or molding.
Safety Gear
Safety cannot be overlooked during the installation process. Essential safety gear includes:
- Safety Glasses: To protect your eyes from sawdust and flying particles.
- Work Gloves: To protect your hands from splinters and rough edges.
- Knee Pads: Hardwood floor installation requires a lot of kneeling, so pads are essential to protect your knees from prolonged pressure and potential injury.
- Ear Protection: Particularly important when using loud power tools like saws and nailers.
Having the right tools and materials on hand before starting your installation will streamline the process and help avoid interruptions, ensuring a smooth and successful project completion.
Preparing the Subfloor
Preparing the subfloor is a critical step that directly influences the longevity and appearance of your hardwood floors.
- Cleaning
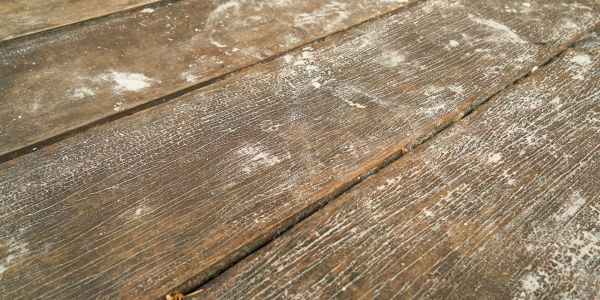
Start by thoroughly cleaning the subfloor to remove any debris, dust, or existing flooring materials. It’s essential that the subfloor is not only clean but also completely dry to prevent mold growth and wood rot.
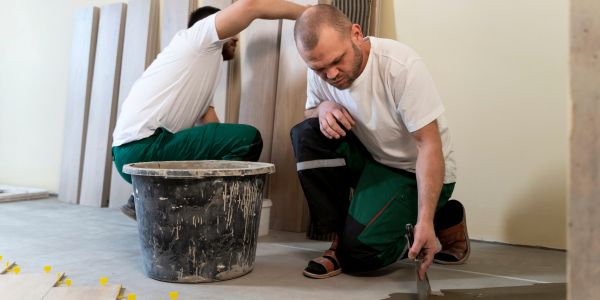
- Leveling
Check the levelness of the subfloor using a long level or a straightedge. Any high spots can cause the wood planks to squeak and may lead to uneven wear. These should be sanded down smoothly. Conversely, low spots should be filled with a leveling compound to ensure the entire surface is flat. This step is crucial as an uneven subfloor can lead to problems with the installation and durability of your hardwood flooring.
- Underlayment Installation
Installing an underlayment is crucial for several reasons. It acts as a moisture barrier, especially important if installing over concrete or in a basement. It also provides sound insulation, reducing noise transfer between floors—a particularly desirable feature in multi-story buildings. Roll out the underlayment per the manufacturer’s instructions, ensuring that it is flat and free from wrinkles before installing the hardwood.
Layout Planning
Proper layout planning is essential to ensure your hardwood floor looks balanced and professionally installed.
- Measuring the Room: Accurately measure the room to calculate the total square footage. This measurement will help you purchase the correct amount of flooring and minimize waste. Add 5-10% extra flooring to your total square footage to account for cutting waste and future repairs.
- Determining Wood Direction: The direction in which you lay the hardwood planks can visually impact the room’s appearance. Typically, planks are installed perpendicular to floor joists to provide better support and stability. This direction can also make rooms appear larger or more cohesive depending on the shape and layout of the space.
- Choosing a Starting Point: Identify the longest, most visible wall to start your installation. This wall will often be the focal point of the room, and starting here helps ensure that the floorboards are laid straight across the space. Use a chalk line to mark the first row, making sure it is parallel to the wall, allowing for a 3/8-inch gap along the perimeter to accommodate expansion. This gap will be covered by base molding or quarter round after the floor installation.
These preparation and planning steps are fundamental to achieving a smooth installation and a beautifully finished hardwood floor that will last for years.
Installation Process
The installation process is where your preparation comes to life, transforming planks of wood into a stunning hardwood floor. Here’s how to proceed for optimal results:
- First Row Installation: Begin your installation along the longest, straightest wall to ensure that your layout remains aligned. Place spacers between the wall and the edges of the planks to maintain a consistent 3/8-inch expansion gap. This gap is crucial as it allows the wood room to expand and contract with changes in humidity without warping. Depending on the type of hardwood flooring you have chosen, you can either nail down the planks using a pneumatic nailer or apply adhesive for a glue-down method. Ensure that each plank is secure and sits flush against the subfloor.
- Sequential Installation: After the first row is laid out perfectly, continue with the next rows. Fit each new plank snugly against the previous row, and be mindful to stagger the ends of the planks by at least 6 inches from the adjoining rows. This staggering not only enhances the floor’s aesthetic appeal but also improves its structural integrity. Avoid lining up the seams, as this can weaken the floor and disrupt the visual flow. Use a tapping block to gently tap planks into place, ensuring tight seams and a smooth surface without damaging the edges of the planks.
- Cutting Planks: As you approach the opposite wall, you will need to measure and cut planks to fit the remaining space. Measure the space, and subtract the expansion gap from your measurement to ensure a perfect fit. Use a miter saw for precise cuts—this tool is ideal for making both straight and angled cuts as needed, especially around corners or irregular protrusions. Remember to measure twice and cut once to avoid material waste and ensure accuracy.
During the installation process, regularly check for level and alignment. Misalignment can compound as you lay more planks, leading to noticeable irregularities in larger sections of the flooring. Adjustments made early can save time and material in later stages. By following these steps, you will ensure a beautifully installed hardwood floor that not only looks professional but also lasts for many years.
Installing the Final Row
The last row of planks often requires special attention due to the restricted space near walls or fixed installations.
- Measuring and Cutting: Measure the space left between the last full plank and the wall, subtracting the expansion gap. Since walls are seldom perfectly straight, measure at both ends of the plank to ensure the best fit. Ripping the planks lengthwise may be necessary to fit the remaining narrow space. Use a table saw for straight cuts or a circular saw if a table saw isn’t available, ensuring each plank fits snugly while maintaining the necessary expansion gap.
- Special Considerations: When encountering obstacles such as vents, pipes, or doorways, precision is crucial. Measure the exact location and dimensions of the obstacle and transfer these measurements to your planks. Use a jigsaw to cut out the shapes needed to accommodate these features. Ensure these cuts are precise to maintain the floor’s aesthetic integrity and structural stability.
Finishing Touches
Final touches are essential in elevating the look of your hardwood floor and ensuring its durability and maintenance ease.
- Sanding: If you’ve installed unfinished solid hardwood, sanding is a critical step. Start with a coarse-grit sandpaper to level the floor and remove any imperfections or adhesive residue, and gradually progress to finer grits for a smooth finish. Ensure that the floor is completely clean and dust-free before moving to the next steps.
- Staining and Sealing: If desired, apply a stain to achieve your preferred color or to enhance the natural grain of the wood. Use a brush or roller to apply the stain evenly and wipe away excess stain with a clean cloth. After the stain has dried, apply a clear polyurethane sealant to protect the wood from moisture, wear, and stains. This sealant should be applied in multiple thin layers, sanding lightly between coats to ensure a smooth, durable finish.
- Trim and Molding: To conceal the expansion gaps and provide a polished look, install baseboards and quarter-round molding along the edges of the room. Nail these trim pieces into the wall, not the floor, to allow the wood room to expand and contract. This step not only enhances the appearance of your floor but also protects the edges from wear and damage.
By meticulously executing these final steps, you ensure that your newly installed hardwood floor looks seamless and functions excellently for many years to come. These finishing touches not only enhance the floor’s aesthetic appeal but also safeguard its structural integrity and longevity.
Maintenance and Care
Proper maintenance and care are essential to preserving the beauty and extending the life of your hardwood floors. Here’s how to keep your floors looking their best:
Daily Care
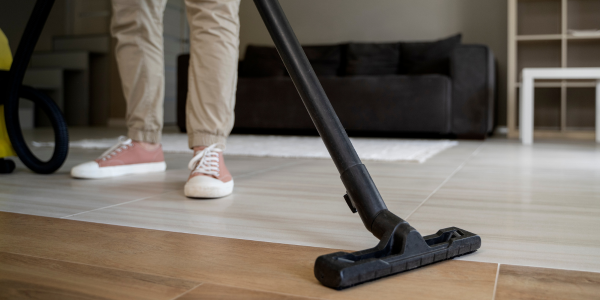
- Sweeping and Vacuuming: Regular cleaning is crucial to prevent dirt and grit from scratching the wood’s surface. Use a soft-bristled broom or a vacuum with a hardwood floor setting to remove debris daily. This gentle cleaning prevents any abrasive particles from damaging the floor over time.
- Mopping: Use a damp mop sparingly to clean your hardwood floors. Before mopping, wring out the mop thoroughly to ensure it is only slightly damp. Excessive water can seep into seams or cracks, causing the wood to swell, warp, or discolor. For best results, use a cleaner specifically designed for hardwood floors; avoid using harsh chemicals, as they can strip the finish and damage the wood.
Preventive Measures
- Furniture Pads: Attach felt pads to the legs of furniture to minimize scratches and dents from daily use. These pads not only protect the floor but also make it easier to move furniture for cleaning.
- Rugs and Mats: Place area rugs or mats in high-traffic areas, such as entryways, hallways, and in front of kitchen sinks. These rugs help to trap dirt and moisture that might otherwise be tracked onto the wood. Ensure that the rugs are made of breathable material to prevent moisture accumulation underneath, which could damage the wood over time.
- Avoid High Heels and Pet Nails: High heels and untrimmed pet nails can cause significant denting and scratching on hardwood floors. Encourage a no-shoe policy in the house and keep pet nails trimmed to help maintain the integrity of the floor.
- Sunlight Exposure: Prolonged exposure to direct sunlight can fade and discolor hardwood floors. Use curtains or UV-protective window films to mitigate sun damage and help maintain the color consistency of the wood.
Seasonal Adjustments
- Humidity Control: Wood expands and contracts depending on humidity levels. Use a dehumidifier during damp months and a humidifier during dry months to maintain relative humidity levels around 35-55% to help prevent gaps or warping.
Professional Consultation
For expert guidance on installing or maintaining hardwood floors, consider a professional consultation with our experienced team at Hardwood Flooring Los Angeles. Our commitment to excellence in flooring craftsmanship and customer service sets us apart. With extensive knowledge gained from years in the industry, we understand the complexities of hardwood flooring installation and maintenance.
When you choose us, you benefit from:
1. Expertise: Our team of flooring specialists is highly skilled in all aspects of hardwood flooring, from selection and installation to long-term maintenance. We ensure that every project meets our stringent standards of quality and durability.
2. Custom Solutions: We tailor our services to meet your specific needs, whether you’re renovating an old space or constructing a new one. Our solutions are designed to align seamlessly with your home’s aesthetic and functional requirements.
3. Quality Products: We use only the highest quality materials, sourced from trusted manufacturers. Our commitment to quality means your floors will not only look beautiful but will also stand the test of time.
4. Professionalism: We pride ourselves on our professional approach to every project, big or small. From the initial consultation to the completion of your flooring project, we are dedicated to delivering outstanding results with meticulous attention to detail.
5. Customer Satisfaction: At Hardwood Flooring Los Angeles, your satisfaction is our top priority. We strive to exceed your expectations at every turn, with transparent communication and exceptional service throughout the process.
If you’re contemplating a new hardwood floor installation or need expert advice on maintaining your existing floors, don’t hesitate to contact us at Hardwood Flooring Los Angeles. Let us help you enhance the beauty and value of your home with our professional hardwood flooring services. Explore the possibilities with us today and make a lasting impression with your beautiful, durable hardwood floors.